
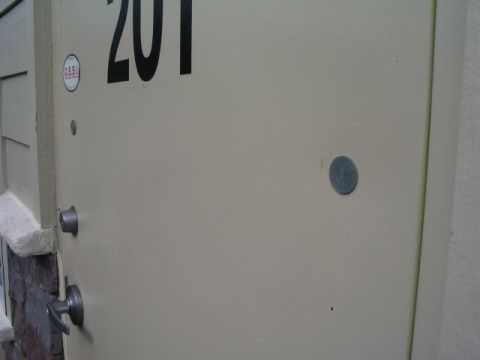
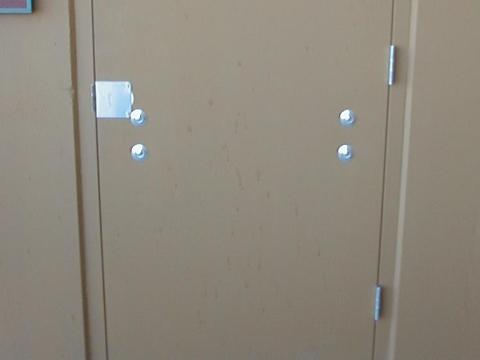
So what is behind door #1? It is very important to read the door, to determine what’s on the other side. We have shown a number of pictures on the site about the “drop bar” and had a few discussions on methods to force entry on some of the unique ones. Check out the supplemental page to read a description about these two doors.
Special thanks goes out to Lt. Matt Rettmer, Castle Rock Fire & Rescue Department and Firefighter Chris Naff, Engine 1, St. Johns County Fire Rescue for sending in these photos.
Looks like we could “plunge cut” either door and use the framing square or Boston Rake to open either one. Difference being the side of the bar we cut. Door #1 would require us to cut under the bar so we could knock it out of place.
http://www.vententersearch.com/framingsquare.htm
Door #1 cut alongside bolt heads at 45 degree angle to cut the bolt heads off, Pike end of halligan to push bolts thru the door, bar falls off door. Force door conventionally or use Circ saw to cut locks. Door number 2, you can also use the circ saw to cut the bolt heads off….bar drops off the door…easy entry since no other locks to contend with. Just another method!
After sending in door # 1 my crew started to talk about different ways of forcing it. The previous ways would work great, but we also though of the K-Tool. Fits over the outside pins very nicely. Just break them off and force it normally. Thanks
Would the Doggy Door method not also work for Door #1?
Thank you for submitting the pictures.. Creates some great discussion and thinking.
I like T. Young’s idea. Even though it would be low, it might work for both doors. Great pictures!
I would agree with truckie942 for most cases but when presented with a rear door with only 4 carrage bolts and no other locking hardware would it be safe to assume (hate using that word)that this is probably panic hardware and is the only locking device (know there is always some weird exceptions)? This seams to be the case in our response area. If this is true, then the plunge cut with the circ saw and “T” square for tripping the device seams like it would be a little faster. Also on our truck we took the great idea of the “T” square and ran with it a little further: Was going to make a folding one so it could be stored flat and attached to the commercial irons. Found one, however, at the local hardware store aready made up! Just used the old “inner tube rubber band” to attach it to the sledge hammer on the irons and she’s ready for work. Will take a pic soon and post it on “Tips From the Bucket”.
I’m not so sure I agree with those who think the T-Square method is the way to go here… In my neck of the woods, panic hardware is generally installed with no visible exterior hardware. Usually when we see exterior bolt heads its some kind of drop bar, which may or may not be a formidable enemy.
I’d lean toward cutting the bolt heads off, or using the sledge to drive them through the door with the pike of the halligan… Or, cut a good sized triangle in the center of the door to facilitate manually dislodging the drop bar.
I’ve got some similar exterior pics, with interior shots too. I’ll send ’em in.
Then there’s always the Fox Police Locks (which the above pics are not) that also have visible exterior bolt heads, and through-the-lock is the way to go.
Be safe Brothers.
what if you had a 6″ hole saw driven by a pnumatic drill
(read scott bottle)and you could cut a hole for inspection,reach through for removal of locking hardware,
even access for a nozzle under the right conditions.